
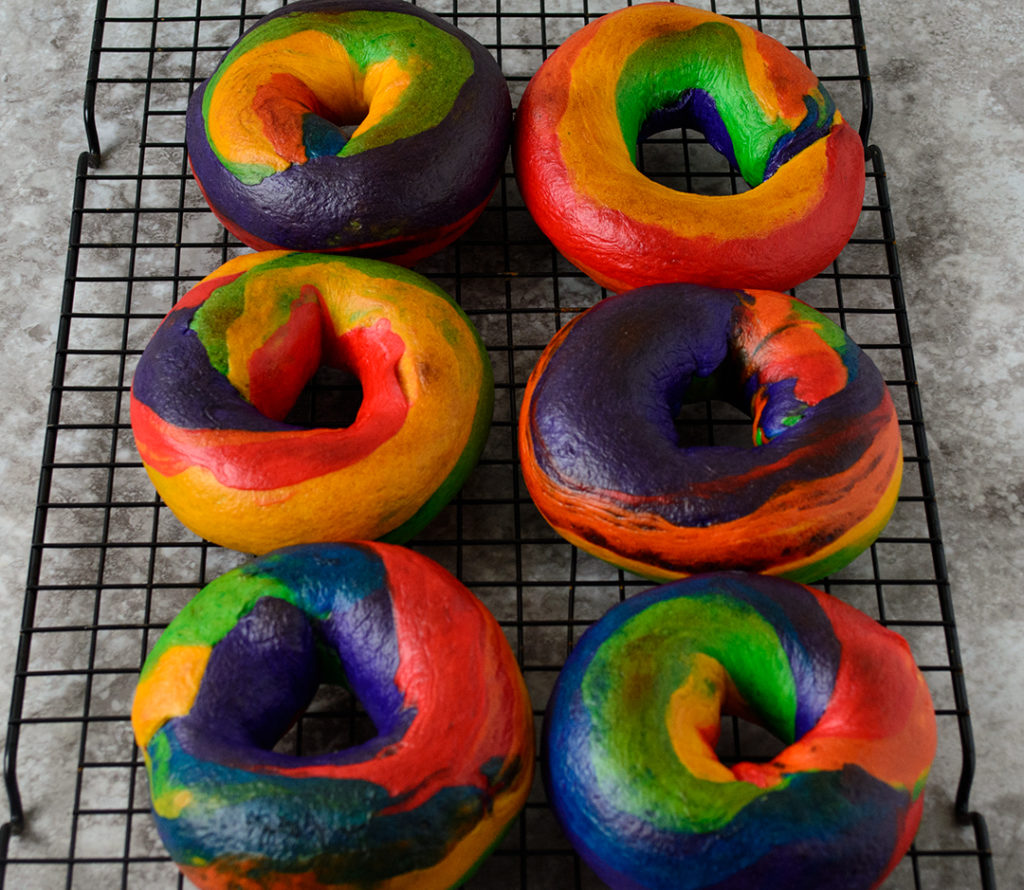
Pardon me while I take a colourful departure from the usual ackee filled recipes and present to you: How to make rainbow bagels 🙃 or as I like to call them Calypso bagels 😉
My sister in law asked me to make her these bagels for an assignment and I figured since I was already going to be making bagels it would be a great time to debut my Ackee Cream Cheese Spread.
As this will be a rainbow bagel making guide I decided to separate the posts into two so as to avoid them being too lengthy, but be sure to click over and check out the recipe for the spread.
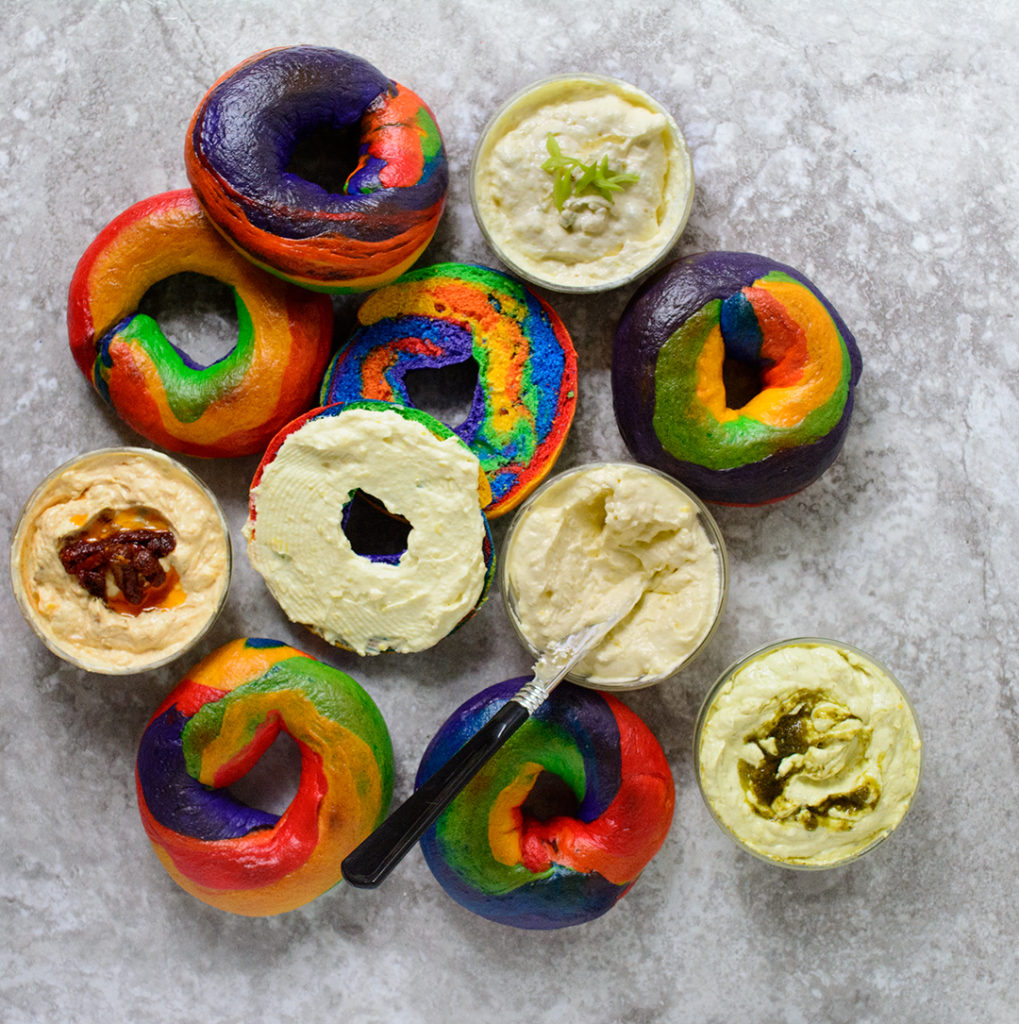
These are all about the cuteness so unlike a “traditional bagel” I have not used malt powder or malt syrup; even so, they still have a chewy exterior and a tender interior. Best of all they can be made and enjoyed on the same day (no overnight refrigeration needed).
Without further ado, let’s begin!
How to make rainbow bagels
It all starts with a basic bagel recipe
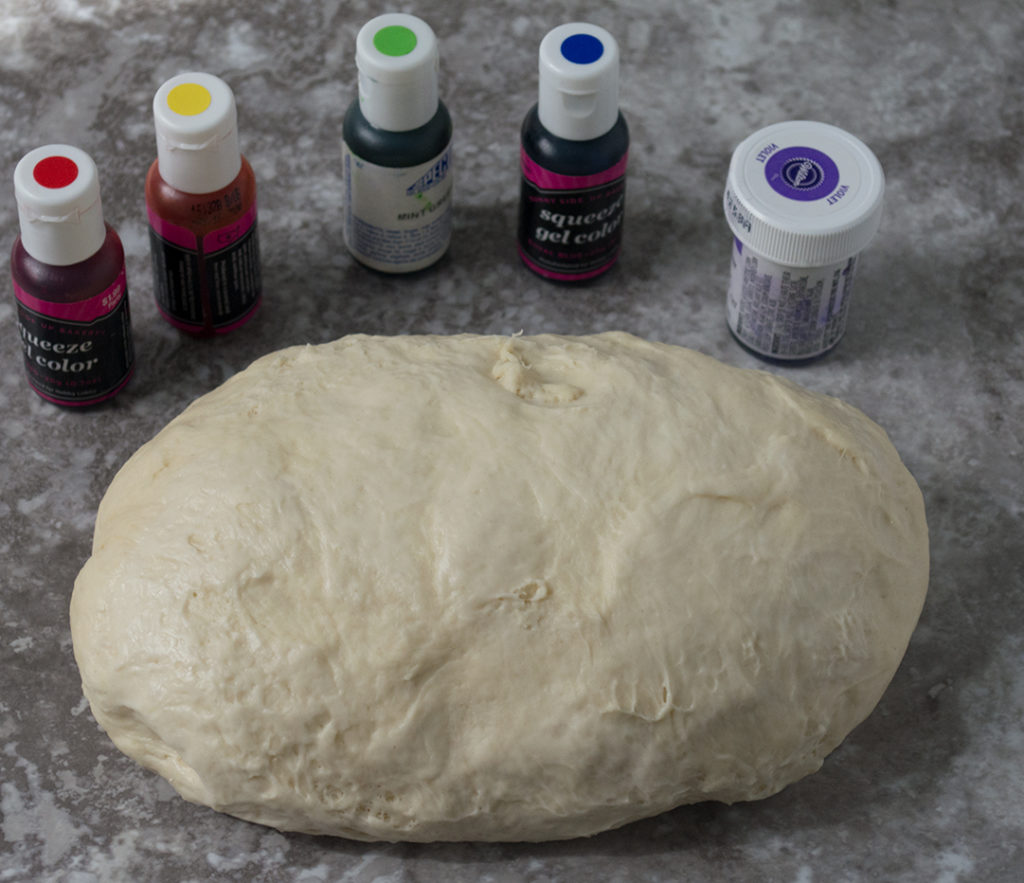
Once proofed, divide the dough into six portions and color (yes there are technically 7 colors in the rainbow but somehow indigo never seems to get invited to these parties).
What type of food coloring to use for rainbow bagels
You want to use a gel based food coloring as they will have a nice intense color. Plus you won’t have to use too much of it and worry about the dough becoming sticky. Or tasting bitter as some food colors do.
Be sure to use gloves when doing this part, I forgot to put on gloves when I got to the cool colors and it has only taken about 20 washes for my hands to no longer be blue (I’ve given up on my fingernails) 😆

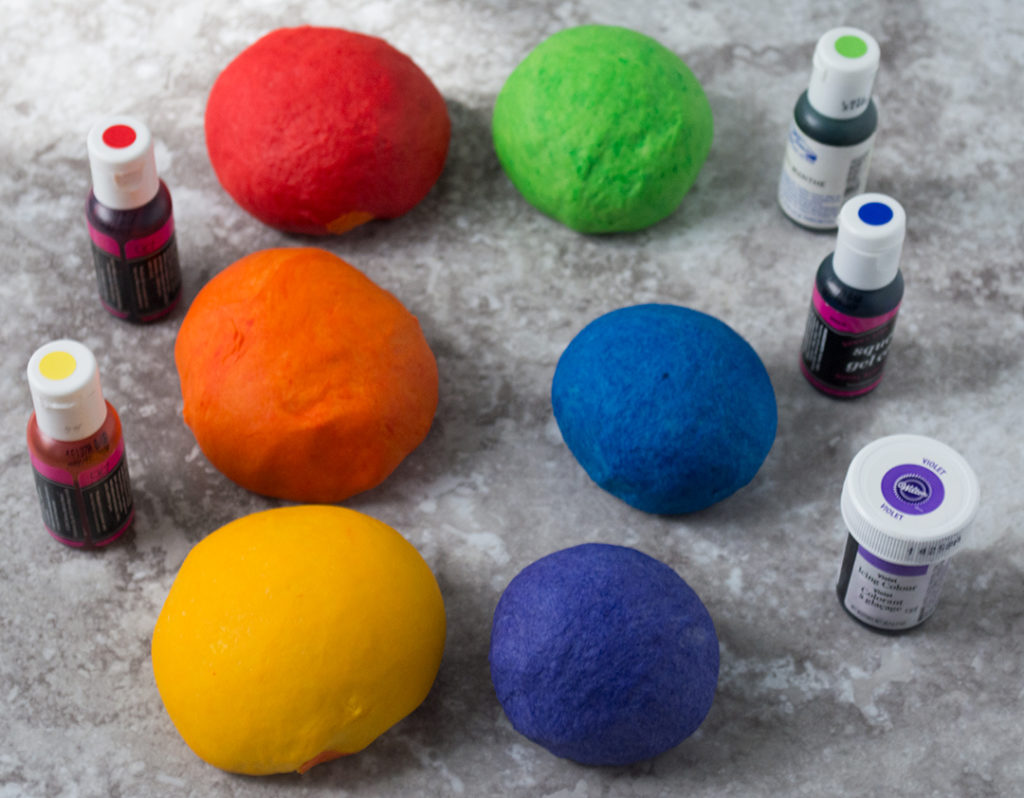
Best order to dye the dough
You can dye your dough in any order you like. For me I wanted to choose them in such a way that if any color transferred from one portion to the next. Then that next color would be stronger than the one prior to absorb it and not be distorted.
For warm I started with yellow then orange and finished with red. Then for the cool colors I started with green, next I did blue and finally violet.

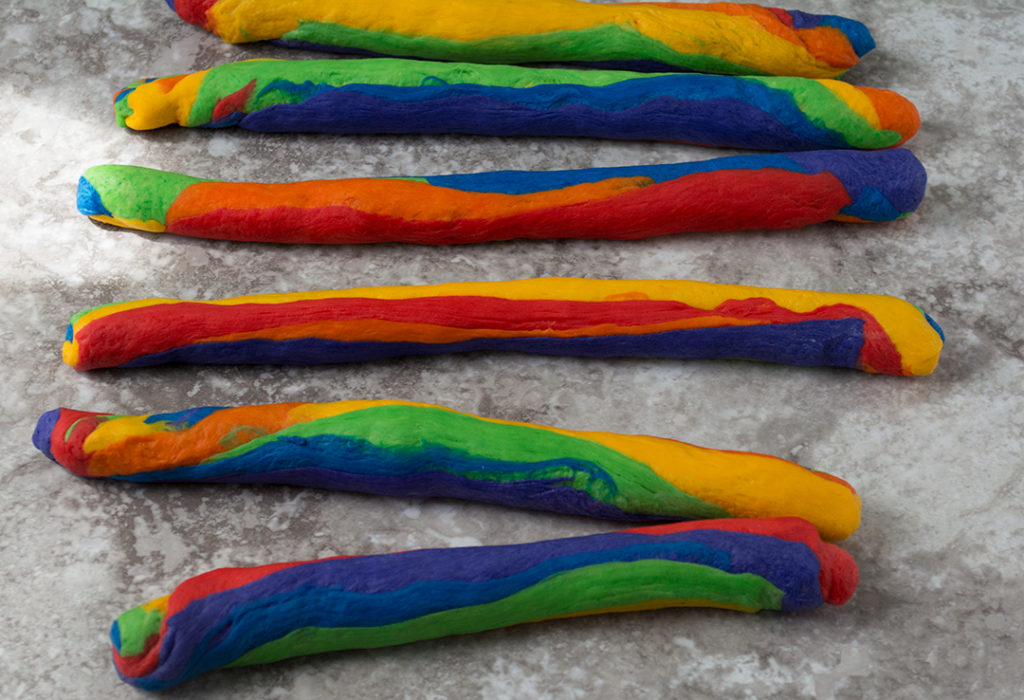
Roll each portion into a rope, then lay them all next to each other
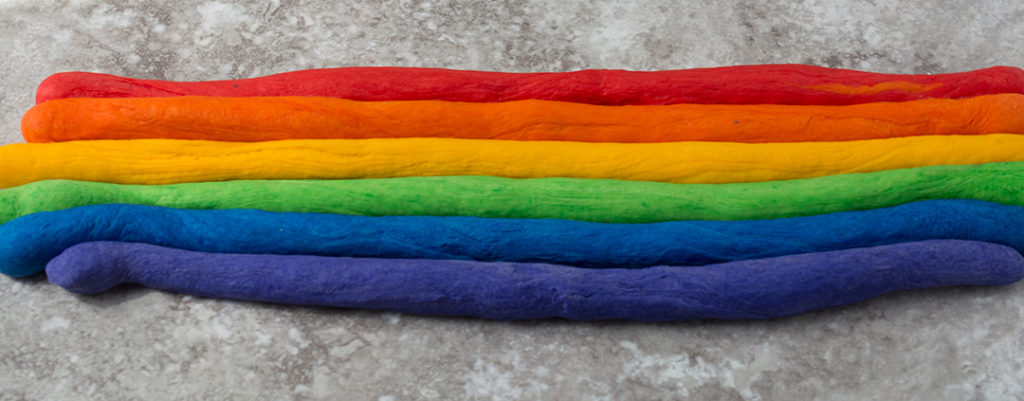
Twirl all the ropes together to make a big log
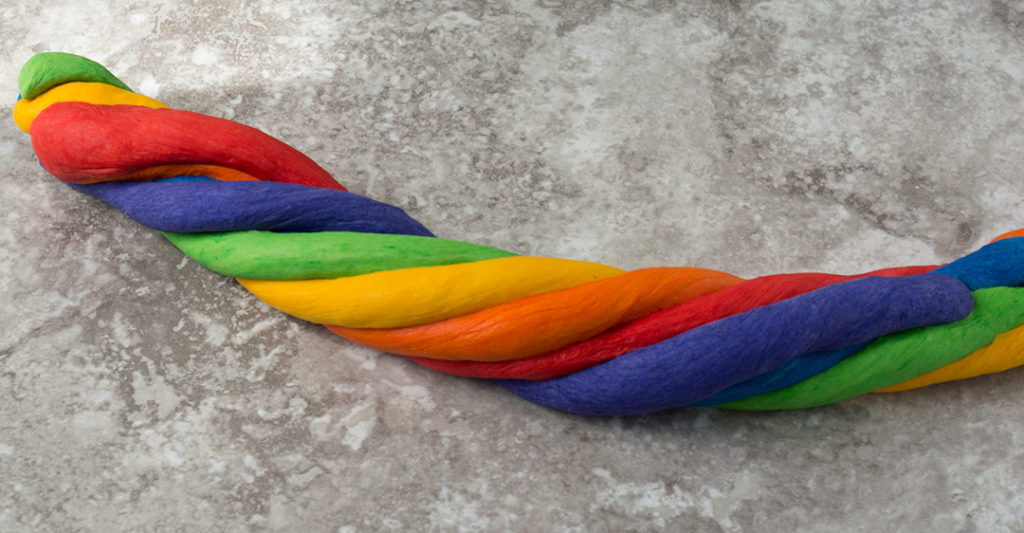
Roll till all the ropes stick together.
You may notice that in the picture that the dough looks a bit wrinkly in some spots. This is because I was shooting each step so it took me longer to move through the steps. The surface dried a little and it developed a skin. Once it’s covered with the damp paper towel the dough gets remoistens and the wrinkles disappear.
How to shape the bagels
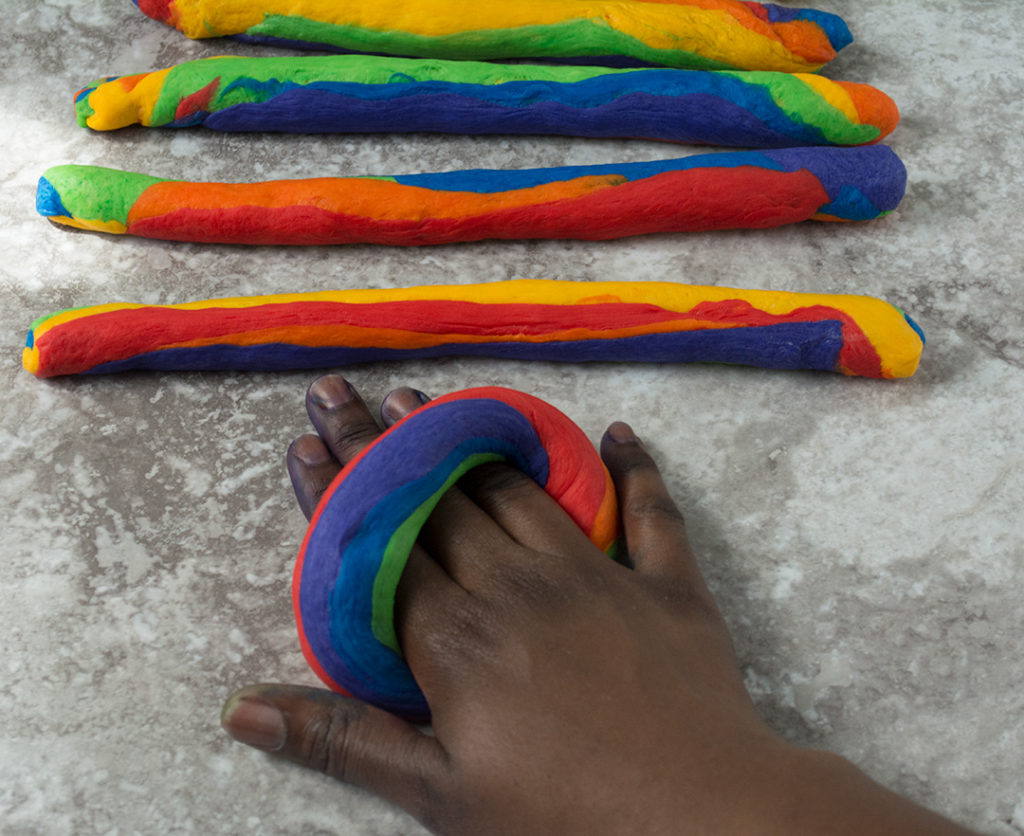
Divide into six again
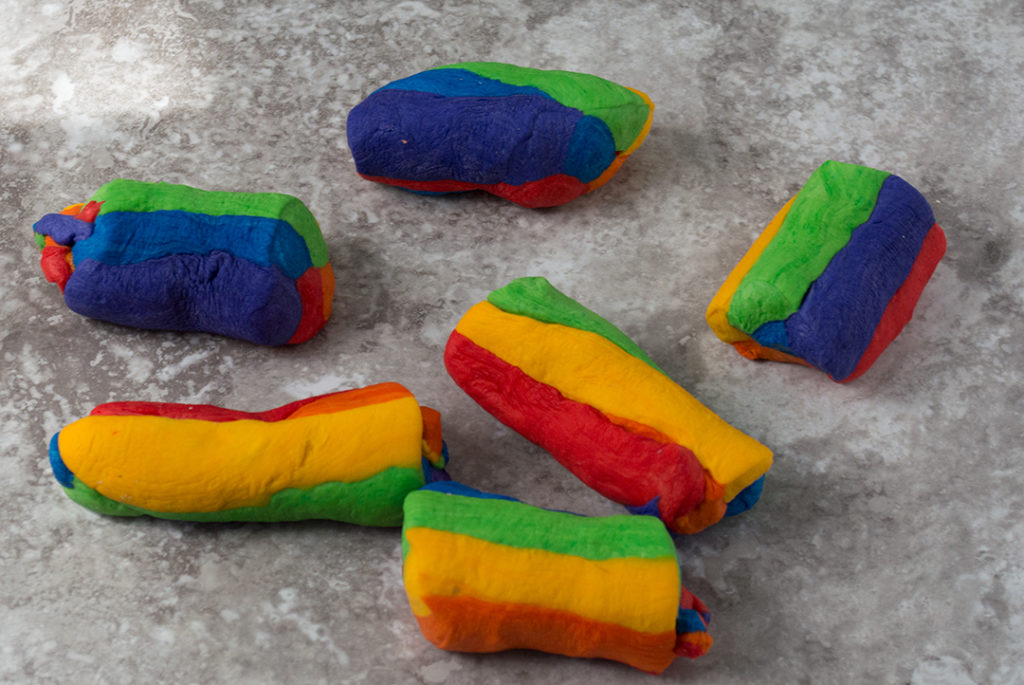
Cover with damp paper towel for 5 to 10 minutes to relax the dough
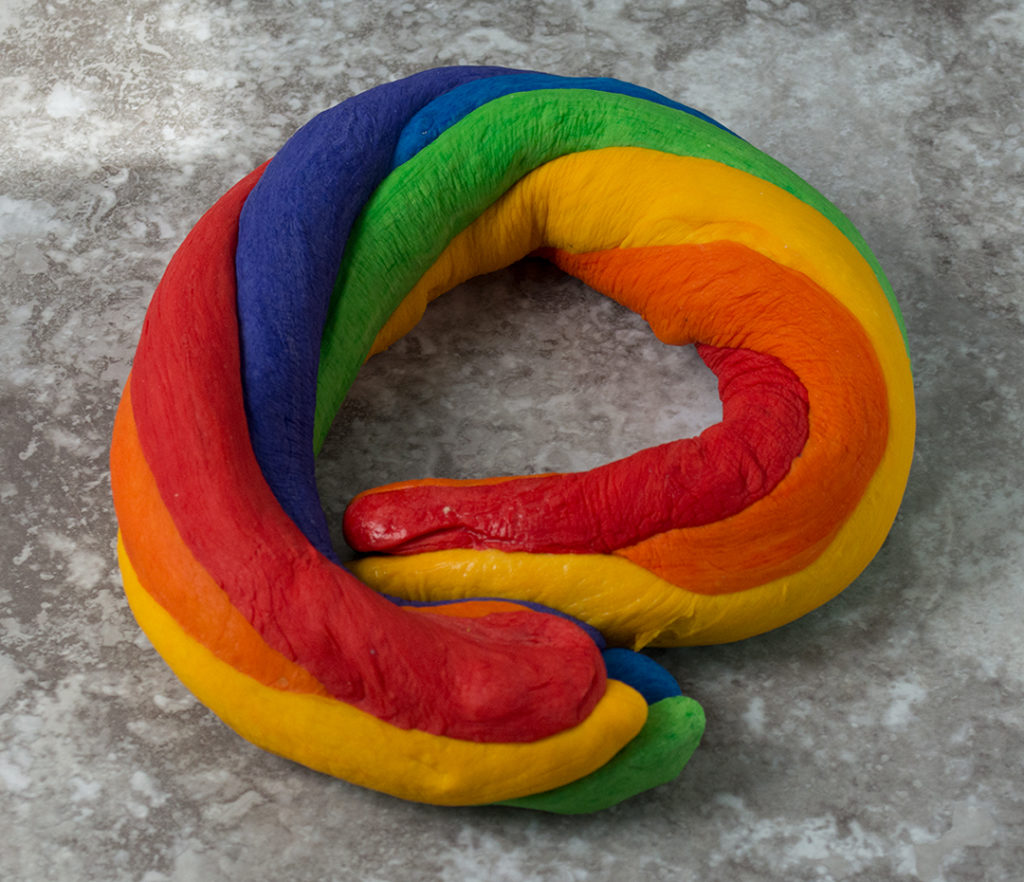
Roll each piece into a rope
Working one at a time (keeping the rest covered) overlap the ends of the rope around your hand and roll pressing down to seal the ends.
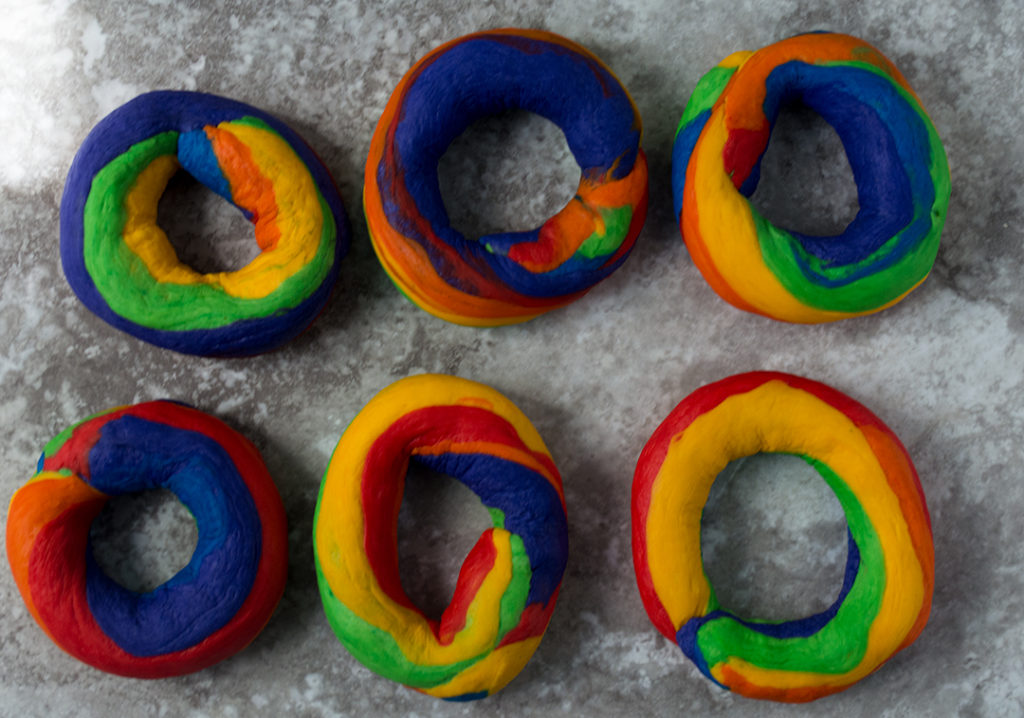
Update (12/21): A wonderful commenter suggested giving each rope one more twirl before sealing the ends and I agree! This will distribute the colours even more beautifully and swirly (lol). To do this: the same way you would have twisted all the colours together before cutting the individual portions. Give each individual portion another twirl before sealing the ends.
Try to apply even pressure so as the bagel is sealed into shape its even all around.
Behold not only the technique for shaping the bagels but also why you should wear gloves when tinting the dough (don’t be like me, save yourself, wear gloves):
Once shaped, cover the bagels with a damp paper towel and let rest for 20 to 30 minutes, preheat the oven to 425F
Boil the bagels
When the bagels have about 10 minutes left, bring a large pot of water to boil.
Boil as many bagels as will comfortably fit in the pot and still allow you to flip them over. Boil for about a minute flipping halfway through. Remove from boiling water with a spatula (you could also use a slotted spoon, I found the spatula to be perfect for the job) and space evenly on the baking tray.
Bake the bagels
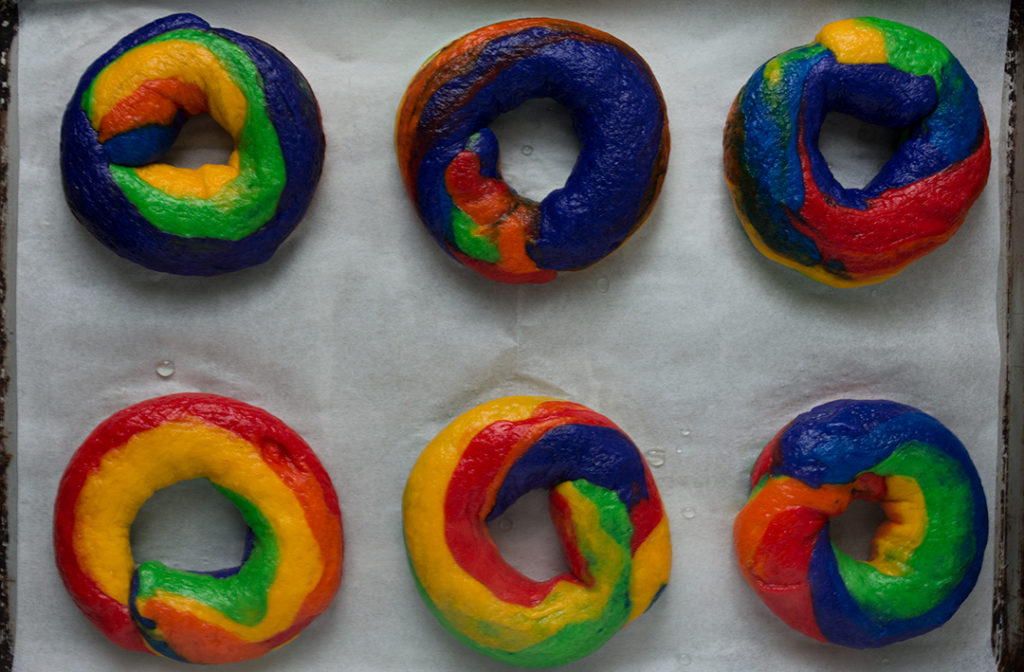
Bake in preheated oven for 15 to 20 minutes flipping over at the 10 minute mark.
Remove from oven when done and allow to cool on wire rack.
These are best enjoyed on the day they’re made, as they have no preservatives or dough conditioners they won’t last like store bought ones. If you want to extend their shelf life, my recommendation is to pre-slice and freeze them, when ready to use you can go directly from freezer to toaster/oven.
What do you think? Feel free to share your thoughts in the comments section below. If you make this or any of the recipes from this site, be sure to #amazingackee and @amazingackee so I can see your posts across social media.
Until next time, thanks for stopping by 😊


Rainbow Bagels
Basic bagel recipe tinted with rainbow colors to create a beautiful swirls, give yourself something more to smile about at breakfast
Ingredients
- 375 g Bread Flour I used King Arthur
- 1 tsp Cane sugar
- 1 1/4 tsp Salt
- 1 1/2 tsp Instant yeast
- 210 g Cold water
- Food colours, as needed
Instructions
Combine all ingredients in the bowl of a stand mixer fitted with the dough hook
Mix on recommended setting until dough is smooth, approximately 10 minutes. Alternately, mix together ingredients in a bowl with a wooden spoon then turn onto work surface and knead for 10 minutes until the dough is smooth
Try to resist adding more water to the dough, bagel dough should be on the stiffer side
Cover with a damp kitchen towel and let rise in a warm place for about an hour
After an hour has passed, remove dough from bowl, press down gently to deflate, divide into six equal portions (I use my scale for accuracy but you can eyeball it)

Tint each portion of dough
Roll each tinted portion into a rope then put together the ropes and roll into a log
Cut into six equal portions and cover with damp paper towel and let rest 5 to 10 minutes to give the dough a chance to rest
Roll each portion into a rope then shape each rope into a bagel shape by overlapping and pressing to seal the ends
Once the bagels are formed, let rest covered with damp paper towel for 20 to 30 minutes. Preheat oven to 425F
When about 10 minutes remain in the bagel resting time, bring a large pot of water to boil
Boil the bagels a few at a time for about a minute flipping halfway through. Remove from pot and space evenly on a parchment lined tray
Bake for 15 to 20 minutes flipping over at the 10 minute mark
When done, remove from oven and let cool on a wire rack
Enjoy!


Affiliate disclaimer: This post contains affiliate links, this means that should you choose to make a purchase through one of the links provided, I may earn a small commission. However, I would never recommend any product that I haven’t personally tried and liked.
SaveSaveSaveSave


Made these fun bagels with my 9yr old twins. This is a good recipe but I think something was slightly off, maybe my fault. I feel like it wasn’t enough dough for 6 bagels. I still stretched to 6 but they were skinny. Did I not knead long enough.. or let it rise long enough? I haven’t made bread since I was a teen.. working with yeast was always tricky to me. Your recipe calls for 375g of flour which translates to a little over 1.5 cups. Is that correct? I loved that you added step by step pics. Ours twisted dough came out like the pics, is just the bagels were too small and didn’t get bigger in the oven.
Hi Jamie! Glad you and your twins had fun making the recipe. If you did 1.5cups of flour then that was too little. One cup of flour is about 120g-135g depending on the kind. So you’d need about 3 cups plus a bit more for this recipe. That would also explain why they were skinny. They don’t puff up that much more in the oven, you really get true idea of the size after they’re boiled.
Hope that helps and you’ll give it another try 🙂
Reviewing this again. I wish I could edit or delete my first 4-star review. I translated the correct flour amount (3 cups) 2nd time making these bagels and they came out perfect. Can’t wait to try more of your recipes.
Hi, this recipe is fantastic! I want to see it listed higher on Google searches because your recipe was hands down the best I tried. Super simple to follow, I love that you uncomplicated the yeast process so people don’t get hung up on timing the yeast foaming! The only thing I would add is to remind people to twist the bagel rope one more time as they seal the two ends together, for me that made the swirl more aesthetically pleasing both outside and in the cross section. Love, love, love this recipe thank you so much for putting it together!
Wow thanks Stephanie! I will certainly add that tip for other users to benefit from. Happy that it was easy to follow for you and that you had results. Thanks again 🙂
Wonderful recipe! Super easy and fun to make especially without having to worry about the yeast fermentation process 🙂 I did use about 3 drops of liquid food coloring (I didn’t have gel) and it ended up producing a lighter color making it somewhat pastel-ey, and it turned out very pretty! Hope this recipe gets more views, love your dishes!